
In WPF we have few options to validate user input data. In this article, I will show you validation based on the exception. This validation is applied in very simple solutions. The only thing you should do is throw an exception on property level and set ValidatesOnExceptions to true in the view.
We should consider two cases:
- setter of the property throw exception and
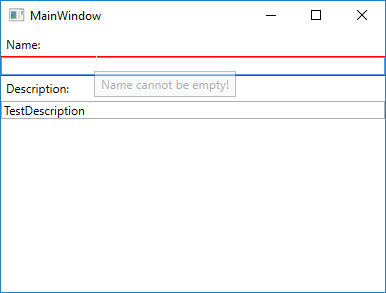
ValidatesOnExceptionsproperty is set to true - in this case, when the user enters an invalid value a red border appears in theTextBox(and theToolTipshows the error message - when we applied an appropriate style) - setter of the property throw exception and
ValidatesOnExceptionsproperty is set to false - in this case, property value does not change and there is not any information about invalid data in the view
In the below image you can see how looks invalid state of the Name property in the view:
So to activate this validation mechanism you should throw an exception in property setter:
public string Name
{
    get => _name;
    set
    {
        if (string.IsNullOrWhiteSpace(value))
            throw new Exception("Name cannot be empty!");

        _name = value;
        RaisePropertyChanged();
    }
}
And set ValidatesOnExceptions to true in XAML:
<TextBox Text="{Binding Name, ValidatesOnExceptions=True,
                Mode=TwoWay, UpdateSourceTrigger=PropertyChanged}" />
Full code example you can find on my GitHub account under the link: https://github.com/kmatyaszek/WPF-ValidatesOnExceptions